Showing posts with label projects. Show all posts

Thursday, August 06, 2009

Architectural salvage, a cautionary tale.

We love old stuff around here. Part of it is our interest in reduce/reuse/recycle, but more honestly, we just like old stuff. Something about the history embedded in collected bits of the past makes them feel special. We also love shopping for them at Seattle's trio of great architectural salvage stores:
1. Second Use (South Park)
2. EarthWise (SODO)
3. Restore (Ballard)

We can spend an entire day wandering around and looking at all the treasures they have saved from the dustbin. In fact, for our recent wedding anniversary, that is exactly what we did. Three salvage stores, lunch at Paseo, groceries from the Pike Place Market, and an amazing steak dinner. Perfect!

So when we started planning for our raised bed garden in the little strip next to the garage it was natural to say "lets see what we can get at Second Use" if only because it is right around the corner (almost) and we don't need much of an excuse to go there. We found that they had a huge assortment of glazed terracotta facade tiles from an old apartment building. These had been around for awhile, and had slowly been coming down in price until they were $2.00 each. They were just what we were looking for and, at that price, were cheaper then anything new. It took about 4 trips (in the CRV) to load and move the 40 or so tiles we needed, but as soon as we got them home Rae got to work cleaning and moving them into place.


She spent most of two days working on them.
Just when they were all in place, and we were about to start sifting in the dirt, she said "there is nothing we should be worried about in using these, right?".
Oops.
Once asked, it occurred to me that they might have a lead based glaze. A quick trip to the hardware store for a lead test kit and several repeated tests later revealed the sad truth. At least some of the tiles tested strongly for lead. I am still not sure if the results are based upon the glaze (since some did and some didn't). My other theory is that many years of exposure to lead carrying auto exhaust had befouled them. Either way, we were not going to grow tomatoes in them.

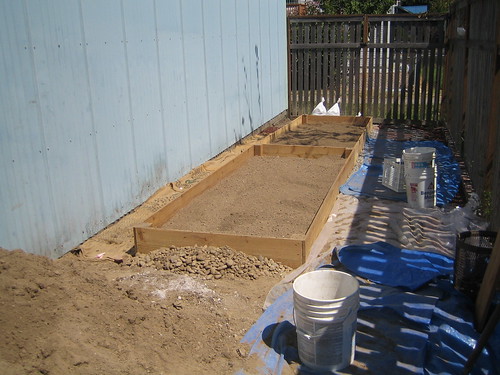
Rae was sad, really sad. So I scooted off to the friendly local lumber yard (Alki Lumber, GREAT place!) and bought enough cedar to rebuild the beds. Rae carted all the tiles away, and we quickly screwed together replacements.


Not nearly as pretty, but at least the veggies won't poison us.
The lesson here is obvious, be careful! Oh, yeah, and think ahead.
When I called to let them know about the lead, the good folks at Second Use offered to take back the blocks. We kept them because we really like the way they look. We will eventually figure out what to do with them, but for now they are exiled to the front yard where they line the fence and collect weeds.

Tuesday, June 02, 2009

We built a patio

Back in July of 2008 we bought this house and started our renovations. One of the biggest tasks was the kitchen which required a complete gut-to-the-studs redo. That could easily be the subject of another post, or two. Anyway, one of the kitchen issues was a large brick chimney taking up valuable counter space. Whatever its original functions, the chimney was now just acting as a flue for the hot water heater. Not only that but it was crumbly and leaning, looking like a strong breeze might blow it over. Seattle has earthquakes, and it had to go.

So one day during the course of the demolition I climbed up on the roof with our contractor and his two assistants. It only took about an hour or two to bust up the chimney and slide the bricks down into the yard.


It took longer then that to stack them up by the garage!
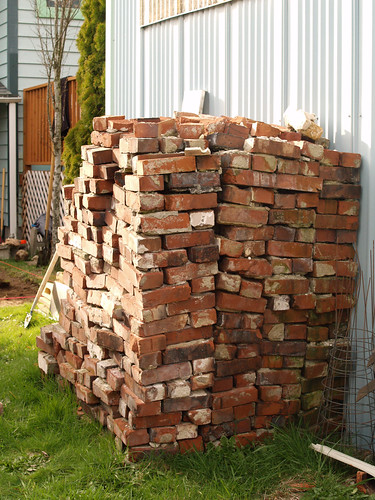

The kitchen project moved on, but the bricks were too cool to get rid of (not that we get rid of much). They were old, uneven, and covered with mortar but we knew that the bricks would get used for something.

This spring we finally figure out what that something was, a patio for the back yard. The back is small and broken up into several separate spaces. There is a nice sized area outside the basement door, another at right angles between the deck and the garage, and then a large space next to the garage where we want to put a raised bed garden (soon!).

Initially we thought we would just put the patio into the space by the door (about 200 sq. feet). However, as we got started it, seemed to make sense to fill in the shaded and almost useless space between the deck and the garage as well (another 200 sq. feet).

We hunted around online for tutorials and found several that seemed useful. The only problem was that they all looked like they were intended for new construction, flat ground, or simple rectangular spaces (none of which apply to us). The basic concept is simple enough, dig a hole, put in gravel, put in sand, put in bricks. Of course, the devil is in the details. Did we need a weed barrier? Should we slope the hole away from the house? If so by how much, and since we were making an "L" shape that gets complicated! How much gravel? How much sand? So many questions. Our answer was to read them all and then just start digging. We call this the "go go go" method.

We figured on 2" of gravel, 2" of sand and 2" of brick (laid flat) so we dug an approximately 6 inch deep hole. Almost immediately we ran into a problem that goes ENTIRELY unmentioned in all of the tutorials. What the hell do you do with 200 cubic feet of dirt (6" X 400 sq. feet)? We simply piled it up in two big piles and decided we would deal with it later (later has yet to come BTW).
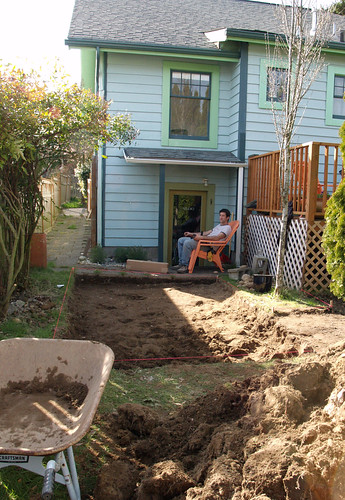


We used some pressure treated wood, and old architectural tiles from salvage for a border. Then we went to the local landscape supply place and ordered gravel and sand. A few days later a truck came and dumped a cubic yard of sand and a yard and a half of gravel which is what they told us would be enough for our hole (and it almost was). The weed barrier seemed like a good idea so we bought landscape "fabric" and rolled it down into the hole before putting in the gravel.

The next challenge was leveling. Our hole was by no means flat, and the gravel was heavy and hard to move. Even with a special purpose gravel/sand rake a friend lent us it was still a pain. After endless discussion about the result we finally just tamped it down with a heavy tamper (also borrowed), and called it good. Then it rained for days (this is Seattle). When the sun finally came back out we jumped at the chance to put in the sand. Heavy. Wet. Sand. Again the leveling was almost impossible until Rae had the bright idea to let the sand dry! Smart that one. We got lucky with the weather and the sand was easy to move once dry, but still hard to level. Eventually we gave up again and agreed it was wabi sabi (this was to become our battle cry).
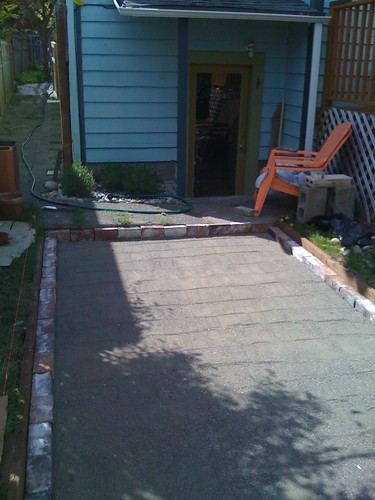

Finally it was time for the bricks! 1200 or so old, crumbly, covered with mortar bricks. Each of which required hand cleaning to get the big chunks of mortar off. Fortunately, Rae likes mindless and repetitive tasks, so she set about sorting and chiseling and scraping and piling. I started setting the bricks in place and trying to get them to fit without having to cut too many. This is where we started discovering lots of little problems. The bricks were not all the same size so the lines were not straight, wabi sabi! The ground sloped one way and the hole another, leaving an inconsistent depth for the bricks, wabi sabi! The sand was not really level and the bricks ended up in "gentle" lumps and waves, wabi sabi. I realize this all sounds like a mess, and it might have been, except we really ended up liking the random features and the tension between order and accident.

It looks good. Really good! The old bricks have a nice worn look making the patio seem instantly aged and permanent. It has this almost European feel as if people had been walking on it for ages. There is just enough pattern and chaos to be pleasing and it is all ours!
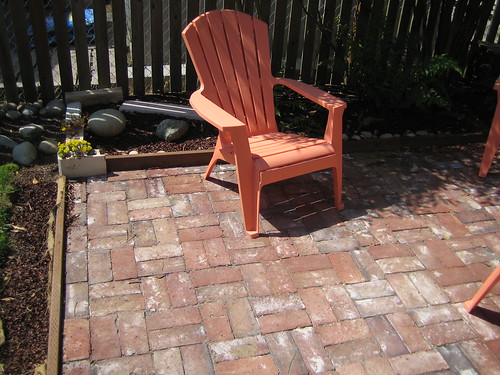
patio

More pictures from Rae

Wednesday, May 06, 2009

LocalHackday May 30th

Joe Gray has been running an open lab night at 911 media arts center for quite a while now. I have been talking up the idea of an Arduino Hackday, and it seems like a natural combination. So on May 30th we are going to have an Open LocalHackday in the "lab" at 911. Bring your projects, bring your tools, bring your toys. Meet other local hardware hackers, artists, and makers. There won't be a formal leader, and it is not a class, but you will definitely learn something!

For me, the focus is going to be on Arduino projects, but that does not preclude you from bringing whatever you are working on.
Just show up!

I have also set up a google group for announcements of other similar upcoming events only:
http://groups.google.com/group/seattle-open-hackday

Here are the details:

Saturday May 30th 2:00PM - 5:00PM
911 Media Arts Center
402 9th Ave N.
Seattle, WA 98109

The event is FREE but I am suggesting a minimum donation of $5.00 to help 911 and defray their costs a little.

If you have questions email me at openhackday [at] gmail

Tuesday, July 17, 2007

oscilloscope

After a few months of research and obsession I bought a scope.
I was getting frustrated with the levitator and thought that having better tools would help.
No, I am lying.
measuring my abilities as an antenna

new toy.  very happy.
Really I just wanted one (and have wanted one for a very long time).
I certainly don't need to prove to anyone what a geek I am, but if I did this would be the way.
For $250 I got a 15 year old tektronixs 2246 from ebay. For those not up on their obsolete test equipment that is a 4 channel 100 mHz scope with built in multi-meter and various other measuring cusors.

With heart in mouth I waited the week it took to get here, wondering the whole time if I had thrown my money away on a door stop. Oscilloscopes are pretty complicated machines, and although I had learned that this was supposed to be a fairly rugged and reliable one, I was sure it was going to be broken. Fortunately it arrived in one piece with all functions seemingly intact.

Now I just have to figure out how to use it.